Dithering is an age-old technique for image quantization, the process of mapping a large set of values to a smaller, usually finite, set of values. Imagine you have a cool Minecraft screenshot:
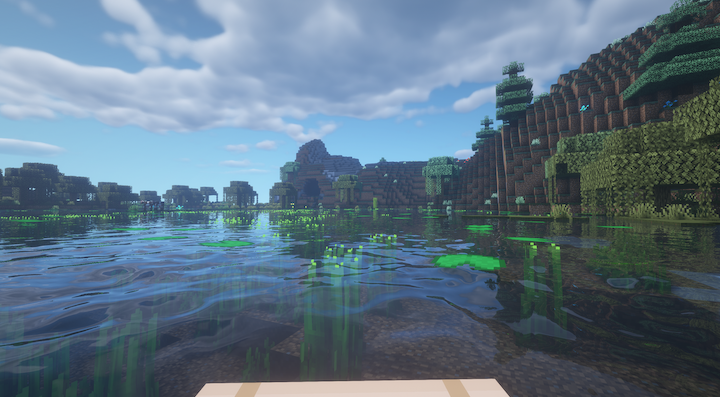
And this image is to be transferred throughout the internet. Now the internet, is a very expensive thing, and image tends to be compressed, sometimes terribly. Dithering is one of such effect, and is extensively used when the internet is still very young - our old PC monitors can only display so many colors, and so the colors have to be mapped from a larger set to a smaller set. This is how the Minecraft screenshot looks like after a 3 BBP dithering:
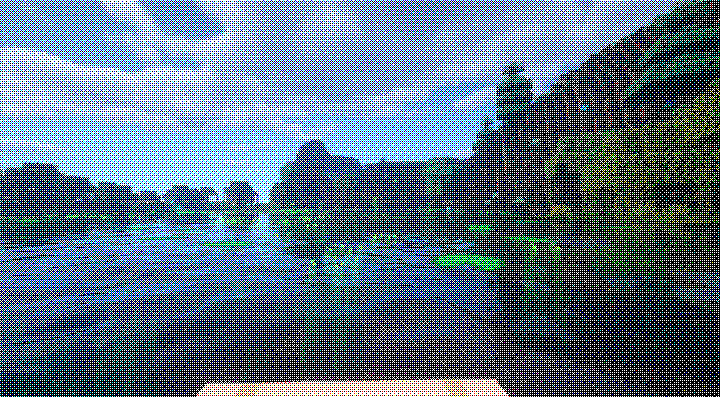
If my blog doesn’t give you an oldschool feel before, it has to now. Notice the obvious cross-hatch pattern the dithering always produces.
General Idea
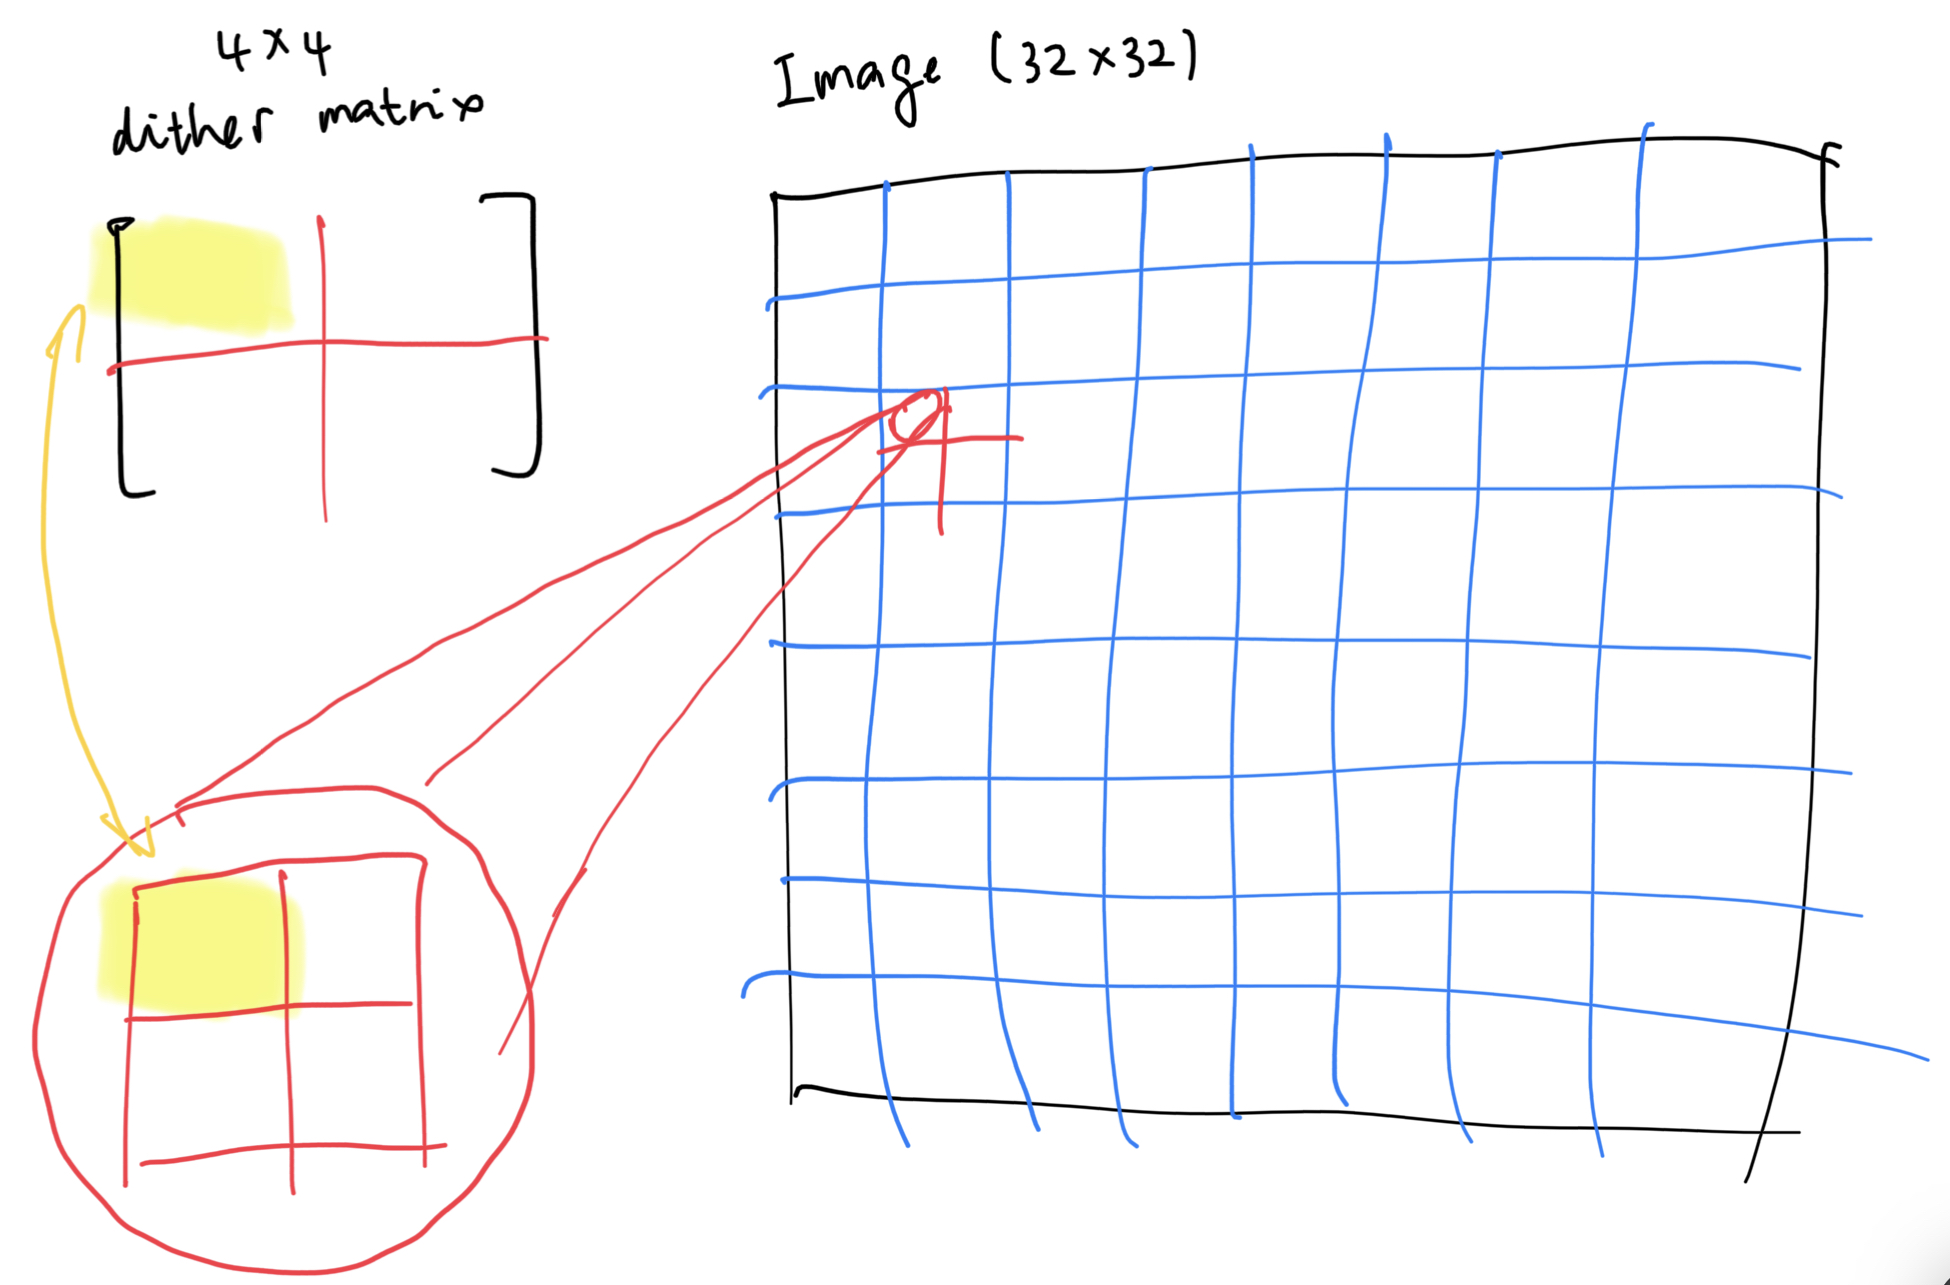
So how does it work? A general idea is that dithering could be done by using the dither matrix, which can be 2x2, 4x4, 8x8, or basically any size, really:
- A dither matrix is provided.
- For each pixel in the image, calculate the corresponding position at the dither matrix.
- Compare the (normalized) color to the value in the dither matrix - if the dither matrix has a larger value there, set the pixel color to black; otherwise, set it to white.
For a grayscale, monochromatic image, we just need to compare every pixel once. For an RGB image however, we will need to compare it for every channel. Here’s another example, with only the red channel of the cave dithered (1 BPP):
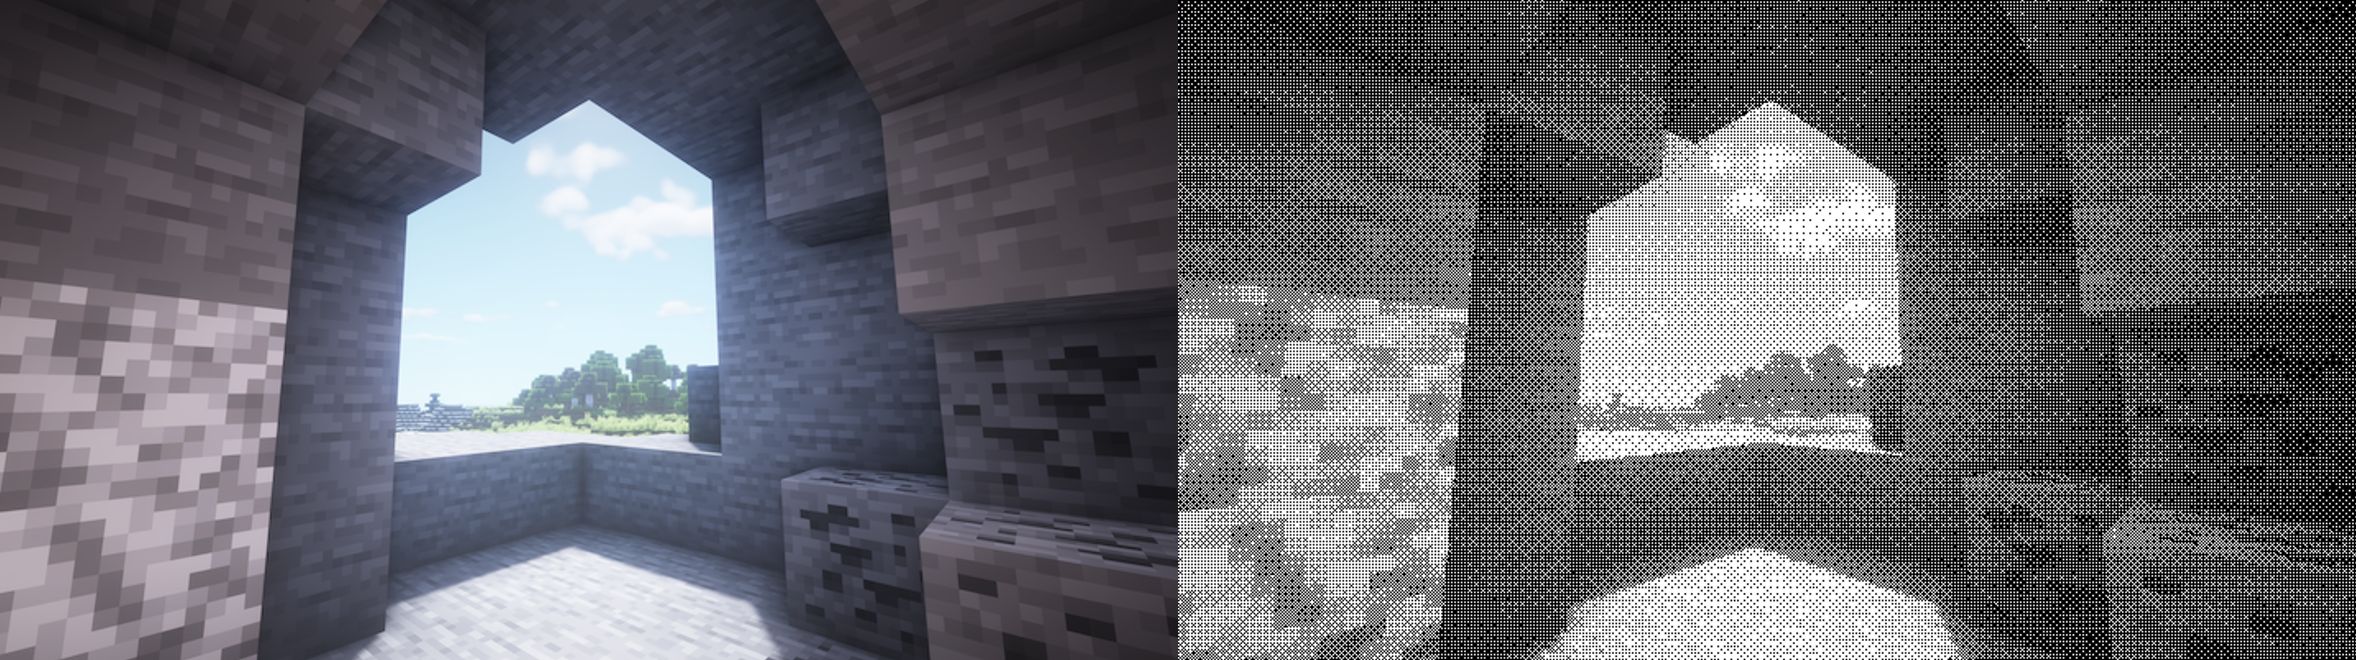
Here’s when the dithered image gains its massive edge: being a binary monochromatic image, as in every pixel can only be black and white, the whole image is clearly discernible, and a lot of features are preserved to the human eye. The image itself is also massively compressed, from the original PNG with a size of 377kb to a measly 43kb.
Dither Matrix
Given the general idea, how can we implement the dithering filter? The first thing is to generate a usable dither matrix. The most commonly used dither matrix is the Bayer matrix (not to be confused with Bayer filter, which is used by photosensors,) also called index matrix, and you can check it out on Wikipedia. The matrix can be calculated incrementally, starting from the most basic 2x2 bayer matrix:
\[M_2 = \frac{1}{4} \begin{bmatrix} 0 & 2 \\ 3 & 1 \\ \end{bmatrix}\]\(M_4, M_8, ..., M_n\) can then be calculated incrementally using this formula:
\[M_{2n} = \frac{1}{(2n)^2} \begin{bmatrix} (2n)^2 M_n & (2n)^2 M_n + 2 \\ (2n)^2 M_n + 3 & (2n)^2 M_n + 1 \end{bmatrix}\]Here’s a pretty straightforward C++ implementation:
Matrix create_initial_bayer()
{
    Matrix initial{
        .mat_width = 2,
        .mat_height = 2,
        .one_over_factor = 4,
    };
    initial.data[0][0] = 0;
    initial.data[0][1] = 2;
    initial.data[1][0] = 3;
    initial.data[1][1] = 1;
    return initial;
}

Matrix bayer_up(const Matrix &mat)
{
    Matrix up{
        .mat_width = mat.mat_width * 2,
        .mat_height = mat.mat_height * 2,
        .one_over_factor = mat.one_over_factor * 4
    };
    for (int y = 0; y < mat.mat_height; y++)
    {
        for (int x = 0; x < mat.mat_width; x++)
        {
            int cell = mat.data[y][x];
            constexpr int fac = 4;
            up.data[y][x] = fac * cell;
            up.data[y][x + mat.mat_width] = fac * cell + 2;
            up.data[y + mat.mat_height][x] = fac * cell + 3;
            up.data[y + mat.mat_height][x + mat.mat_width] = fac * cell + 1;
        }
    }
    return up;
}
Dither
With the Bayer matrix in hand, it’s time to do the actual dithering. For every color component of every pixel in the image, we perform the following:
- Determine the corresponding location of the pixel in the dither matrix.
- Compare their values.
- If the value in the dither matrix is greater, color it black; otherwise, color it white.
The corresponding location can be found by simply taking the mod result of the current pixel location:
Assuming the color is normalized (ranging from 0 to 1,) the new color can be defined as:
\[c_{\text{new}} = \begin{cases} 1, & \text{if } c_{\text{old}} > B_{r, c} \\ 0, & \text{otherwise} \end{cases}\]Traditional dithering algorithms are very fast because it doens’t have to involve floating point arithmetics. This can be done by postponing the normalization of the dither matrix, as shown in the above bayer matrix generation code, and perform the division only after multiplication. In other words, instead of normalizing our color to \([0, 1]\), we can instead scale the dither matrix values to \([0, 255]\). Sure, some precision will be lost; but we are compressing stuffs anyway, so it doesn’t really matter. Here’s both dithering algorithm results, presented side-by-side.
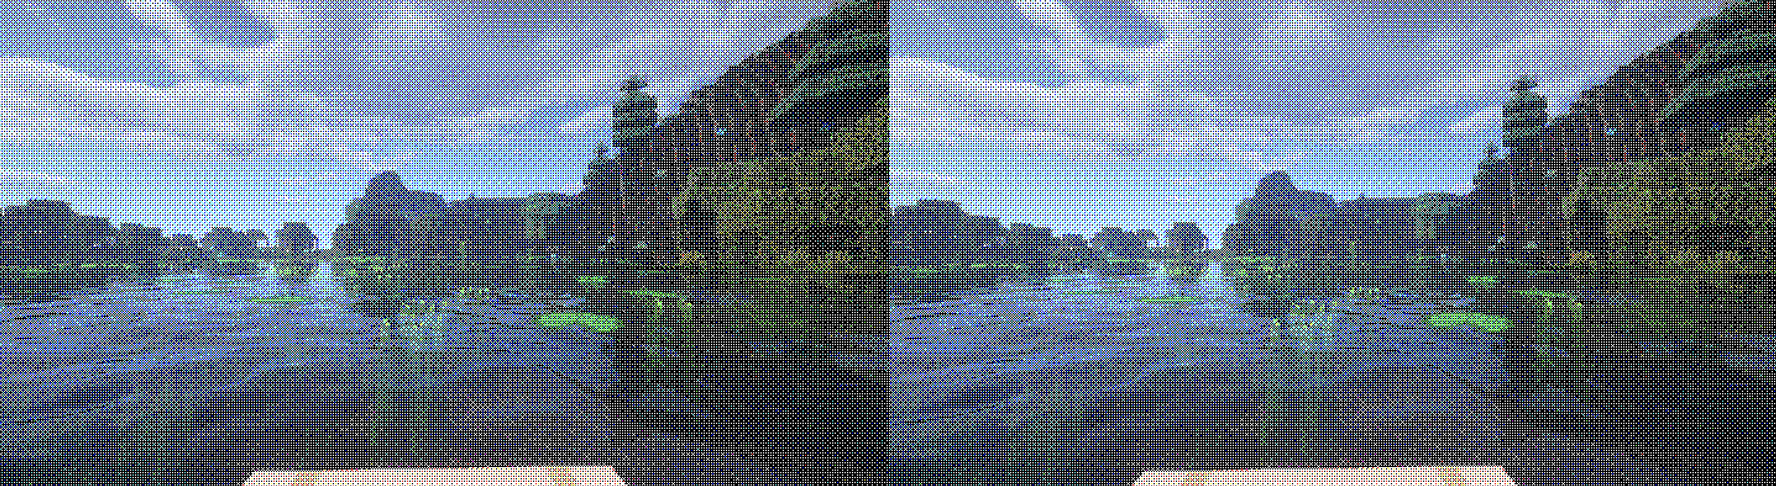
The floating point one is on the right. Notice anything? No? Because they virtually have no differences.
bool dither(Image &image, int bayer_n)
{
    Matrix bayer = create_initial_bayer();
    for (int i = 0; i < bayer_n - 1; i++)
    {
        bayer = bayer_up(bayer);
    }

    //
    // From https://www.visgraf.impa.br/Courses/ip00/proj/Dithering1/ordered_dithering.html :
    // If the value of the pixel (scaled into the 0-9 range) is less than the number in the corresponding cell of the matrix, plot that pixel black, otherwise, plot it white.
    //
    for (int y = 0; y < image.height; y++)
    {
        for (int x = 0; x < image.width; x++)
        {
            Texel t = image.texel_get(x, y);
            int mat_loc_x = x % bayer.mat_width;
            int mat_loc_y = y % bayer.mat_height;
            for (int i = 0; i < 3; i++)
            {
                int d = bayer.data[mat_loc_y][mat_loc_x] * 256 / bayer.one_over_factor;
                if (t[i] <= d)
                {
                    t[i] = (unsigned char) 0;
                }
                else
                {
                    t[i] = (unsigned char) 255;
                }
            }
        }
    }
    return true;
}
Only tens of lines of code. It’s simple, it’s fast, it’s oldschool. What’s not to like?
![]()
Futher Readings
- A look at various simple dithering algorithms in C++: explains what dithering algorithms are, and various methods of dithering.
- Shaders Explained: Dithering: takes a step further and introduces an error diffusion dithering algorithm called “Flyod-Steinberg Dithering”.
- StackOverflow: Is this a correct implementation of ordered dithering?: gives a brief implementation of ordered dithering without floating point arithmetics
- Wikipedia: Quantization: Introduces what quantization means in image processing.
- Atkinson Dithering: introduces Atkinson dithering, another dithering method.
Comments