During my computer graphics development endeavours, I found out that I am usually in need of exporting what I am currently rendering to an image. Of course you can use regular screen capture softwares like ShareX (tryu it out, it’s awesome!), or when you want to debug graphically, there’s RenderDoc. But still, what if, for example, an end user is using your software, and they want to export the render? Surely you will not tell them to use a screen capture software, right? So here we go!
Create a Framebuffer
First, we need to tell OpenGL to render to anything other than the default framebuffer. What is a framebuffer you ask? LearnOpenGL really is the best website to know. opengl-tutorial also covers this problem. But in a nutshell, we are always rendering stuffs onto a framebuffer - it’s just that the default one is provided by GLFW or SDL or what have you. Framebuffers can hold their own color buffers, depth & stencil buffers, and so on. Since we can specify the framebuffer’s output textures, by rendering onto a framebuffer, we can actually access the render directly by accessing the specified texture. So first, we need to create a framebuffer:
// Generate texture
glGenTextures(1, &texture_gl);
glBindTexture(GL_TEXTURE_2D, texture_gl);
glTexParameteri(GL_TEXTURE_2D, GL_TEXTURE_WRAP_S, GL_REPEAT);
glTexParameteri(GL_TEXTURE_2D, GL_TEXTURE_WRAP_T, GL_REPEAT);
glTexParameteri(GL_TEXTURE_2D, GL_TEXTURE_MIN_FILTER, GL_LINEAR);
glTexParameteri(GL_TEXTURE_2D, GL_TEXTURE_MAG_FILTER, GL_LINEAR);
glTexImage2D(GL_TEXTURE_2D, 0, GL_RGB, framebuffer_width, framebuffer_height, 0, GL_RGB, GL_UNSIGNED_BYTE, nullptr);

// Generate RBO
glGenRenderbuffers(1, &rbo_gl);
glBindRenderbuffer(GL_RENDERBUFFER, rbo_gl);
glRenderbufferStorage(GL_RENDERBUFFER, GL_DEPTH24_STENCIL8, framebuffer_width, framebuffer_height);

glGenFramebuffers(1, &framebuffer_gl);
glBindFramebuffer(GL_FRAMEBUFFER, framebuffer_gl);
glFramebufferTexture2D(GL_FRAMEBUFFER, GL_COLOR_ATTACHMENT0, GL_TEXTURE_2D, texture_gl, 0);
glFramebufferRenderbuffer(GL_FRAMEBUFFER, GL_DEPTH_STENCIL_ATTACHMENT, GL_RENDERBUFFER, rbo_gl);

glBindFramebuffer(GL_FRAMEBUFFER, GL_NONE);
Here, we first generate a framebuffer, binds it to GL_FRAMEBUFFER, then we do the following:
- Generate & bind a texture to framebuffer’s GL_COLOR_ATTACHMENT0;
- Generate & bind a renderbuffer to framebuffer’s GL_DEPTH_STENCIL_ATTACHMENT.
Renderbuffers are optimized render targets, which are basically textures, but optimized so 1. it’s faster and 2. we can’t access its content. Without a bound depth/stencil renderbuffer or a texture, the result render will be weird because there’s no way to perform depth test. We can check a framebuffer’s completeness by using
if (glCheckFramebufferStatus(GL_FRAMEBUFFER) != GL_FRAMEBUFFER_COMPLETE)
{
    // Incomplete framebuffer. Something is probably wrong with OpenGL.
}
Tell OpenGL to Render to Framebuffer
It’s actually very easy to tell OpenGL to render stufffs onto a framebuffer. Given that a framebuffer is correctly constructed, all you need to do is
glBindFramebuffer(GL_FRAMEBUFFER, framebuffer_gl);
glViewport(0, 0, framebuffer_width, framebuffer_height);
// Every draw call below will draw stuffs onto the framebuffer
// glDrawArrays(GL_TRIANGLES, ...)
glBindFramebuffer(GL_FRAMEBUFFER, GL_NONE);
// Don't forget to reset the viewport to the window's viewport!
// glViewport(0, 0, window_width, window_height);
To check and verify that things have been indeed rendered into a framebuffer (because you will see nothing on screen), we can render a full screen rectangle after the framebuffer operations are done, and shade it by sampling texture_gl above, which is bound to the framebuffer’s GL_COLOR_ATTACHMENT0:
glUseShader(some_shader);
glBindVertexArray(rect_vao);
glBindTexture(GL_TEXTURE_2D, texture_gl);
glActiveTexture(GL_TEXTURE0);
glUniform1i(glGetUniformLocation(some_shader, "tex"), 0);
glDrawArrays(GL_TRIANGLES, 0, 6);
During this stage, you can actually post-process the thing you just rendered, such as flipping its color:
#version 330 core

in vec2 uv;
out vec4 color;

uniform sampler2D tex;

void main() {
    vec3 rgb = vec3(texture(tex, uv));
    color = vec4(1.0 - rgb, 1.0);
}
Indeed, this is where image-space (or screen space) techniques get its name from: ambient occlusion, shadow mapping, ReSTIR DI, Deferred shading, etc. By operating in the image space, these methods are usually way quicker, more efficient, and have less wasted calculations (because users are guaranteed to see the results).
Save the Texture
But I digress. With the texture in hand, now the problem becomes how to save the texture. And hey! What’s this convenient single-header little library called stb_image_write.h doing here? Let’s try it out!
std::unique_ptr<unsigned char[]> data = std::make_unique<unsigned char[]>(width * height * 3 * sizeof(unsigned int));
// Or you can just:
// unsigned char *data = new unsigned_char[width * height * 3];
glBindTexture(GL_TEXTURE_2D, texture_gl);
glPixelStorei(GL_PACK_ALIGNMENT, 1);
glGetTexImage(GL_TEXTURE_2D, 0, GL_RGB, GL_UNSIGNED_BYTE, data.get());
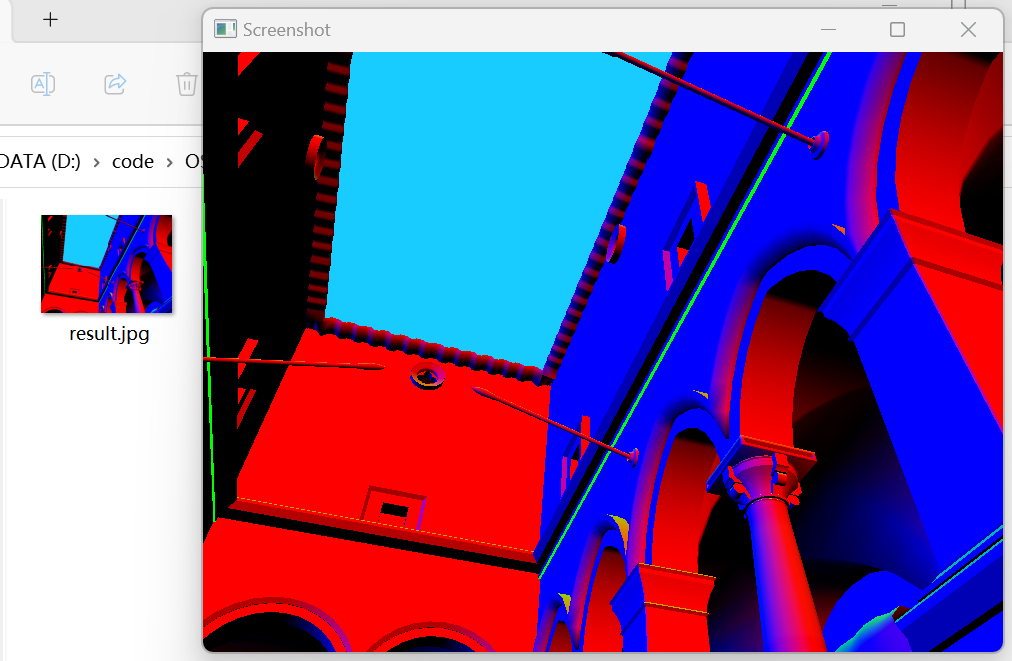
stbi_flip_vertically_on_write(true);
int ret = stbi_write_jpg("result.jpg", width, height, 3, data.get(), 100);
if (ret == 0)
{
// Cannot save image for some reason
}
// Image is saved to result.jpg
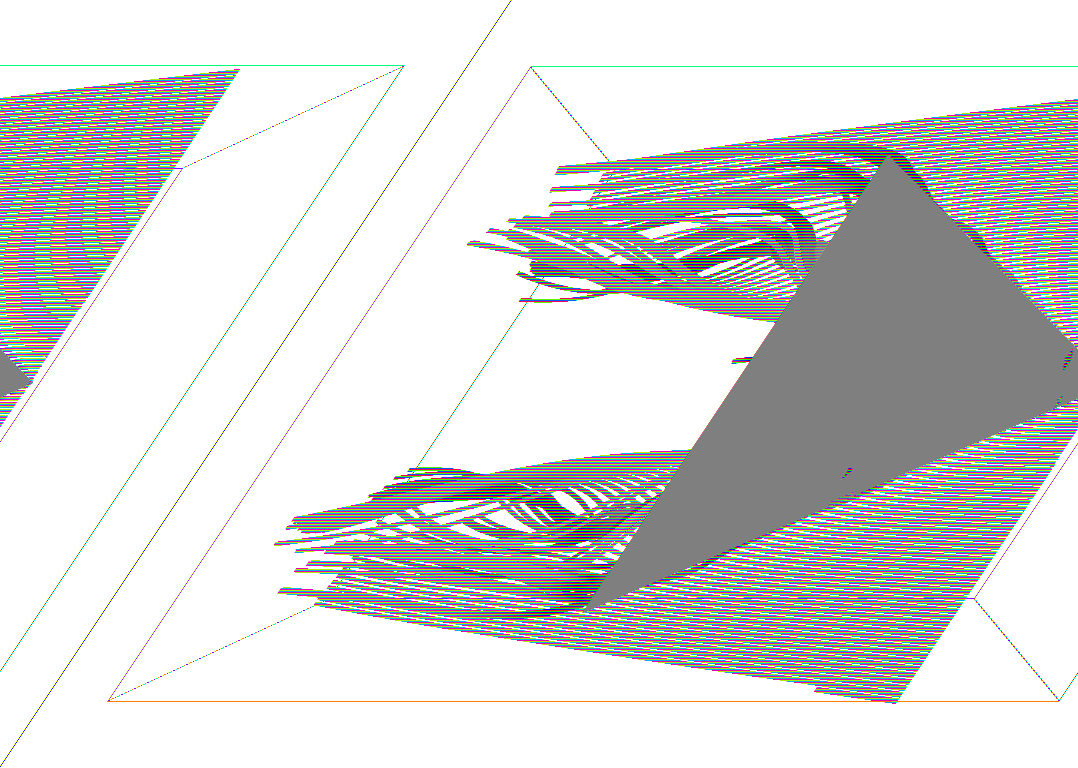
The line glPixelStorei(GL_PACK_ALIGNMENT, 1); is used to specify image memory row alignment, this can prevent skewing in the final result when the image size is weird. Here’s an example (1078x768) I’ve encountered when I was making my vector visualization app:
Anyway, yay! Now we have the render saved to result.jpg. Other than JPEG format, stb_image_write supports BMP, TGA, JPG, and HDR. You can write these images directly into memory as well (if you feel like it.) Check out the in-code documentation to learn more.
Conclusion
We have learned how to render to framebuffers, and then write that to local disk today. And that’s important, because with this technique in hand, we can export more than regular output channels; for example, we can export the depth map, and inspect what’s wrong with it as well. Of course, framebuffers are not just used to take screenshots. For example, we can chain framebuffers together so that we can render what’s inside a TV. We can render a portal by rendering the world seen through the portal first, then overlay that result onto the portal texture. We can do screen space lighting, shadow mapping, and more. The possibilities are endless!
Comments